DIY Mold & Mildew Bathroom Solutions with Ames Products
Troubleshoot and Treat Mold & Mildew Problems the DIY Way
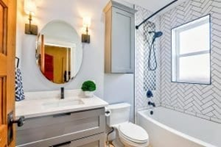
A foul-smelling bathroom is not among the most desirable aspects of any home or business, but the odor may not always come from the most obvious source. Mold and mildew can bring both an unpleasant smell and an eyesore to any bathroom that isn’t properly protected or ventilated.
Preventing spore growth isn’t a job that requires a professional handyman or plumber. Like many intimidating-at-first projects, it can be handled by a DIY-er with a little elbow grease and these helpful tips:
What Do You See, Smell, and Feel?
First, you must identify any problem areas with a thorough inspection of the bathroom:
- Can you see any black or pink mold in your bathroom? Check walls, ceilings, floors, cabinetry, tile, grout, and/or sealant surfaces.
- Does your bathroom have any visible wet spots? Check walls, ceilings, floors, and the interiors of cabinets.
- Can you feel any soft spots in the floor along the perimeter of your bathtub, shower, or toilet base?
- Are there any loose tiles in the shower, bathtub, walls, or floor?
- Take a deep breath: Can you smell a musty odor in the bathroom or under any bathroom cabinets?
- Go to the room underneath the bathroom (if possible – this includes the basement), and check the ceiling for wet spots or mildew.
- Finally: Do you see any wet spots or mildew on the walls, baseboards, or floors in any rooms adjacent to the bathroom?
Possible Causes
If you could see, smell, or feel any of the problems listed above in your bathroom, it’s time to determine what the causes are:
- Check the supply pipes at the connections to your bathroom fixtures for leaks.
- If you found any wet spots on the walls or floor, you may have a leaky supply pipe inside the walls.
- Check the drains under the sink, toilet, shower and/or bathtub for leaks.
- Check your grout – is any of it severely cracked or missing altogether?
- Check your sealant connections (where the edge of the shower/bathtub meets the walls and floor). Is any of it loose or missing altogether?
- You may have an inadequate shower/bathtub enclosure (especially if you use a curtain!). If your unit uses a door, check the perimeter for leaks and cracks.
- Does your bathroom have an exhaust vent? Lack of ventilation can lead to excessive moisture in the air.
- If the ceiling of your bathroom is directly underneath the roof, be sure to check any vents that may communicate between the roof and the bathroom for loose and/or broken sealants.
- Check any windows in your bathroom for missing or broken sealants (inside and outside).
Found The Problem; Now What?
Different problems will require different skills to resolve. Some may be too complicated for a casual DIY-er, but some may be resolved easily with a few simple steps:
- If there are no other apparent clues to the source of water damage other than some surface mildew or mold around your ceiling and upper walls, consider adding a bathroom exhaust vent fan to remove the trapped humidity.
- Consider installing an HVAC Vent in your heating/air conditioning system to aid in circulating the air out of your bathroom.
- If you have noticed leaks in your plumbing
supply lines, you might try two options:
- Tighten all fittings or replace valves to stop any leaks.
- If the source of the leak appears to be inside the walls or under the floor, those barriers may have to be removed.
- If the supply lines or shower heads are leaking in the wall of your shower/bathtub and that wall is shared by an adjacent room, you may be able to triangulate the location of the leak via the adjacent room. You can then more efficiently cut an access hole in the drywall to repair the leak from the adjacent room without removing a bathtub enclosure or tile in the bathroom.
- If you have soft spots in the floor or walls,
the probability of having concealed mold and mildew damage is higher. You can
identify soft spots a few different ways:
- Using your fingers, push on the problem area to feel for sponginess.
- Take an awl, large nail, or screwdriver and push it by hand into the surface. If the point goes in easily there is probable moisture and deterioration.
- If the suspect area is inside a tiled bathtub, take a small masonry drill bit approximately the width of the grout line and drill a shallow hole just through the grout. Take care not to over drill through the underlying substrate.
- After drilling the shallow hole push an awl or small nail through the drilled hole and test the underlying substrate for firmness or sponginess.
- If damage has been identified under finishes and behind the bathtub and tile enclosures it is best to remove the finishes in order to properly repair, seal and waterproof the underlying substrate before installing new finishes.
- After finishes have been removed, you may determine that drywall needs to be removed due to extensive deterioration from water or from prevalent mold that has migrated into the walls.
- If the subfloor around the edges of the bathtub, shower and toilet is soft you may need to cut out and replace a portion of the subfloor to resolve the damage. This may involve spot cutouts with structural cross bracing or a complete subfloor replacement. It is especially important that the area around the toilet drain flange is structurally sound and the flange is supported solidly by the sub-floor to avoid leaking around the wax ring sealing the toilet to the toilet drain flange.
- It is highly recommended to line the walls around the bathtub and shower area with a cementitious underlayment sheet material, then a waterproofing anti-fracture membrane to further protect the substrate against future damage.
- It is also recommended to use a waterproofed underlayment and a shower pan waterproofing membrane if floor tile is being used.
Kill the Mold and Mildew
This might be the easiest part, and it’s definitely the most satisfying:
- Once wall and floor framing or subfloor sheathing have been inspected for re-use, any mold or mildew on the surfaces needs to be removed. This can be done with the use of a mildewcide or a solution of one-part bleach to three parts water. Protect your eyes and provide adequate ventilation while performing this task. Allow the wall and floor cavities or sheathing surface to dry completely after treatment to avoid trapping residual moisture under new finishes.
- This remedy also applies if the mold and mildew problem is only on the surface of your bathroom finishes. Scrub away the mold and mildew before repainting or installing other finishes.
Prevent Future Mold & Mildew
Now that it’s finally gone, avoid repeating this problem in the future by following these care tips:
- Mold, even when detected, can be difficult to completely remove due to its root structure that can grow into wood and drywall. Suspect surfaces with extensive mold should be replaced instead of cleaned.
- Prepare your walls, bathtub, and shower enclosures
to prevent reoccurrence of moisture migration.
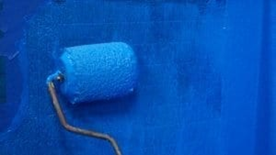
- Ames Blue Max Liquid Rubber Waterproofer is a ready-mixed single component rubberized elastomeric liquid-applied material for use under tile in both interior and exterior applications.
- Blue Max cures into a continuous waterproof membrane which allows direct bonding of ceramic tile or a pre-formed shower enclosure.
- After your new finishes are installed, be sure
and seal properly around the perimeters of your bathtub, shower, enclosure
doors, windows, and toilet bowl base.
- When sealing around your toilet bowl base it is recommended to leave at least an inch of transition between the toilet bowl and floor at the back of the toilet open to allow for wax ring leaks to be detected in the future.
If you’re interested in more DIY tips, check out the complete DIY application information for the Ames Blue Max Waterproofing Membrane.
Need more help or have questions? Let us talk about your bathroom. Call us toll-free: 1-503-389-6432